Showing posts with label beauty. Show all posts

March 24, 2014

"No Makeup" Makeup Routine


Hello everyone!! I know I've taken a few months off from blogging but I am back :) This winter has been so harsh and I just couldn't bring myself to shoot OOTDs outside, so once I gave that up for the winter, my blogging went along with it. But now the weather is starting to get (somewhat) warmer so I've been inspired again and am back with a makeup tutorial. Today was a lazy day off for me so I went with my typical "no makeup" makeup routine. Basically, this is just how I do my makeup whenever I know I am not going anywhere special, or when I am just hanging around the house and I just want to wear minimal makeup. You can't really tell I'm wearing a full face of makeup because I apply it in a way to make it look as natural and possible. The goal of this routine is not to look super glamorous, but to cover up any imperfections such as uneven skin tone, acne, and dark circles.

Step 1:
First, you want to start off with a primer to create a base for your foundation to go on flawlessly and last longer. This will also prevent foundation from settling into fine lines and wrinkles. Most primers have special purposes, like Benefit "That Gal" which is a brightening primer to brighten up your complexion if your skin is looking dull.

Step 2:


On days when I don't want to do a full-on makeup routine, I opt for a BB cream rather than a heavy foundation. What I really love about this BB cream in particular is that it gives really great coverage without feeling heavy like a foundation. It also has a satin finish, as opposed to other BB creams that I have tried that tend to make you look oily. I always apply this with my Sigma F88 brush.


Step 3:

I use this concealer because it is quick and easy to apply. All you do is draw this on underneath your eyes and down the side of your nose, connecting it and filling it in, in the shape of a triangle (hopefully you can visualize what I am talking about just by reading it!) I usually just blend this out with my fingers. I'm going to be honest.. this isn't the absolute best concealer I've used but I like how the stick is easy to apply and it does the job of hiding my undereye circles. Sometimes this concealer does crease, so be sure to set it with a powder, like this one:

Step 4:

This is the powder I use to set my undereye concealer. This gives a really nice brightening effect and also prevents my concealer from moving or creasing at all. I apply this with my Real Techniques Setting Brush.

Step 5:

I dust this powder lightly on my cheeks, chin and nose area with my Real Techniques Buffing Brush. This is where my foundation tends to break up the most and I have dry skin, so I don't apply this to my whole face.

Step 6:

Instead of doing a complete contour, I sweep this bronzer in the hollows of my cheeks, sides of my forehead and along my jawline with my Real Techniques Blush Brush, just to bring some color to my (extremely pale) face.

Step 7:
Blush is one thing that I am constantly switching out and experimenting with, but recently I have been loving Benefit Dandelion. I usually stick with a light blush color when I wear minimal makeup, and this one really compliments my skin tone. I apply this to the apples of my cheeks and back to my temples with my Real Techniques Contour Brush. I blend it out with my Buffing Brush again.

Step 8:
 
I love filling in my eyebrows, but on lazy days like today I skip that step and instead just use Benefit Gimme Brow. This product is pretty unique in that it is a one-step brow product that shapes, fills in and sets your brows all at once. It has a tiny wand that looks like a mascara wand, and all you do is dip the wand in the product and brush it through your brows. Of course, it's not going to shape them perfectly but on days like today, that isn't really necessary.
Step 9:

I apply this nude eyeliner in my waterline. I love this product because it really brightens and opens up my eyes. My eyes are usually always red and I find that putting on foundation and concealer emphasizes the redness in my eyes, so I always use this nude liner to eliminate the redness. Again, this looks very natural because it is skin-colored and just adds to the "no makeup" makeup look.

Step 10:

Like blush, I'm always changing my mascara. I've been using this Buxom Amplified Lash Mascara for a while now and I actually really like it. This opens my eyes and makes me look more awake. I like to just focus on making one aspect of my face more dramatic when I am not using a lot of makeup anywhere else.

 Step 11:

To finish off the look, I put on my favorite lip balm instead of any lipstick or lipgloss. 

Step 12:

 To set all of the makeup I use MAC Fix+. This helps my makeup last longer and prevents my foundation from looking cakey as the day goes on.

I hope you all enjoyed this makeup routine! Xo


November 21, 2013

How I Fill in My Brows

So here is the story of my eyebrows.
When I was in middle school, I had the best eyebrow waxer. She always shaped my eyebrows so perfectly  and I thought I was one lucky girl because good eyebrow waxers can be hard to find in my opinion. Then one day, she disappeared from the salon she was working at and I never heard from her again. I had to resort to going from nail salon to nail salon to achieve the perfect brow, and anyone who has gotten their brows done at a nail salon knows that they really don't know what they are doing in terms of actually shaping (but for 6 bucks, you can't really complain). I always ended up with uneven brows with absolutely no shape to them, and I was never happy. I always ended up just trying to tweeze them myself because I figured I could do just as good of a job. Finally, earlier this year, I started going the Benefit Brow Bar at Ulta and I've never looked back. If you go to their site you can watch/read in-depth about their approach to everything brows, but long story short: If you want to go to a professional who will shape your brows correctly for your face, invest in a $20 Benefit brow wax. I promise you, it is worth the money.

You may not realize, but brows are a very important feature for changing the way your entire face can appear. A nicely arched and defined brow can really open up your face, and that is why it is super important to give your brows some TLC. So obviously, the first step to doing so is shaping them. I clearly go with waxing but if you prefer threading, that's fine too. Secondly, filling in your brows to define them and make them stand out is the next important step. I recently started filling in my brows and I cannot go a day without doing it or else I literally feel naked. It really just changes your entire face. Even on days when I'm wearing minimal makeup, I still lightly fill them in. It is also a great tactic for hiding messy brows. At times when I am in dire need of a brow wax, or am trying to grow them out a bit, filling them in makes them look 10x better than leaving them bare. This is because I'm defining them into what I want others to see and making the stray hairs a lot less noticeable.

Filling in your brows is not a difficult task and I really think it is something everyone should do. Here is a step by step tutorial on how I fill in my brows..any beginner should be able to follow along!

First things first: Here is a before and after picture.

Step 1: Brush your hairs with a spoolie brush into the direction that you want the hairs to all flow and into the shape you'd like them to be in. This will help put any stray hairs in place (I know you have all woken up with those crazy brows with the hairs facing in every direction!)

Step 2: Trace along the bottom of your brow with a brow pencil. I use the Anastasia Brow Wiz in Brunette. You can see how even just this small step goes a long way in making your brows look much more defined and polished. 

Step 3: Using a brow powder and an angled brush, trace the top of your brow. This is where you can really define your arch, or fake one if yours is not defined enough. For a more defined brow, you can continue this line to the inner portion of your brow, but for a casual everyday look, I usually keep this portion of the brow bare or with very little product. For this step, I use the darker shade of the Anastasia Beverly Hills Brow Powder Duo in Dark Brown.

Step 4: Fill in the body of your brow using the same brow powder and angled brush. The outer tail of your brow should be the darkest, and it should gradually fade as you move inwards. For this step, I mix both the light and dark color of the Anastasia Brow Powder Duo in Dark Brown. Once you are done, Brush your brows out with a spoolie brush just to make sure everything is evenly blended and then set with a brow gel. I use the Anastasia Beverly Hills Clear Brow Gel.

Once you are done with one brow, repeat for the other brow! One important tip that I've  learned along the way and repeatedly heard from the pros is that your brows are sisters, NOT twins. It is going to be nearly impossible to get them looking exactly the same as each other, so don't worry if one has a bigger arch, is thicker, etc. This frequently happens to me but it is not something to stress over! 

Here are a few pictures of my full face before and after filling in my brows, just so you can see the way it changes my face. 

BEFORE: 

AFTER:


I hope this was helpful for you guys! 'Like' this post if you'd like to see more tutorials like this and if you decide to give filling in your brows a try, let me know how it goes!

November 1, 2013

October Favorites

As I am sitting here typing this, I am currently listening to my Spice Girls Pandora station with my Pumpkin Cupcake candle burning, and I have to say, it is perfection. I had to mention this because I feel it is so fitting for a favorites post, and I really think I need to include this Pandora station to my favorites. It is seriously amazing and I have not skipped one song yet...I suggest you get comfy, light your favorite fall scented candle, and put this station on while you read this post!


This has been my holy grail eyeliner for as long as I can remember. I have tried so many other eyeliners- liquid, pencil, gel, you name it- and I always seem to come back to this one. I use it to line my upper lid and wing it out, and I just love the way it glides on smoothly. It is so easy to use and especially to wing out. Some other eyeliner pencils that I have tried are too creamy for winging, but this one is perfect. Not to mention it is super pigmented and very black!

So since I decided that I would include a different candle in my monthly favorites, this month's favorite has been Pumpkin Cupcake! I'm not one of those people who is obsessed with everything pumpkin flavored, but this candle sure does smell good, so I had to jump on the pumpkin bandwagon for this one. Also...I just had a mini heart attack because when I looked up the link for this candle, I saw Bath & Body Works's holiday candles on the website....And now I'm going to the mall this weekend to buy them.

This facial cleanser literally makes me excited to wash my face every night. Not only for the fact that it leaves my face feeling so clean and soft, but mainly because it smells amazing. I can't even describe the smell and I don't know why I'm so in love with it... it really just smells like fresh, clean skin. 

You were probably wondering what the heck this was from the picture...I got a free sample from Sephora of the new Urban Decay  Revolution Lipsticks and it came with 4 shades, one of them being Anarchy. I actually love this lipstick in general and picked up one of the other colors, but I'm soo in love with this color as well and I think I might need to buy the full size version! It is a bright pink-fuschia color, but it is surprisingly very wearable and not too crazy. Plus, it lasted all day long with one application, even through eating. 

I really can't say enough good things about Sally Hansen nail polishes. I will probably be doing a full review on this product but I needed to mention it in my monthly favorites because, well, it's been my favorite this month! This color is so great for fall and I swear it looks just like an Essie color, except it was half the price. I painted my nails this color and it literally stayed on for almost 2 weeks. Of course it did start to chip, but not as bad as when I get my nails done at the salon.

6. OPI Natural Nail Base Coat and Top Coat
Ulta was recently having this amazing promotion for OPI nail polish where if you buy two, you get a base coat or top coat free. So obviously, I justified buying 4 nail polishes so I could get the base coat and top coat for free! I've only used them so far with my Sally Hansen polish but I would attribute some of the reason why my most recent manicure did not chip as much to using a great base and top coat.

7. Garnier BB Cream Skin Renew Miracle Skin Perfector- Fair/Light
I used this BB Cream over the summer in a darker shade (when I had a tan) and really liked it so I decided to try it out in the lighter shade to match my pale skin now. I will also probably be doing a full review on this product. I like the way it does not feel heavy on my skin and I have been using it in place of foundation on an every day basis since I got it.

Happy November!

October 22, 2013

REVIEW: Mario Badescu Whitening Mask

This is definitely a product I've been loving lately so I really wanted to do a full review on it for you guys. I recently started buying a few Mario Badescu products because I had heard a lot of good things about them. After going through the endless amount of his products at Ulta, I decided to get this mask (and a few other products). It cost $24 for 2 oz but honestly, I've been using this stuff for a few months already and I've barely even made a dent. I can already tell this will last me a very long time. 

What it does
This mask is meant to "reduce hyperpigmentation," "soothe irritation and sensitivity" and "clean congested pores" (as per the Mario Badescu website). The main reason I bought this was to reduce the hyperpigmentation I have left behind on my face from past acne.

Application
Apply a thin layer of this mask 1-2 times per week and leave on for 10 minutes. Rinse off gently with warm water. 

My Review
I have literally been trying to get rid of my hyperpigmentation since high school (if you have hyperpigmentation/acne scars, you know how stubborn they can be). I have tried tons of different products-both high end and from the drugstore, and nothing has worked as well for me as this product. I use it 1-2 times a week and have only been doing so for about 2 months, and I can already see a big improvement in my skin. My hyperpigmentation has definitely faded and I feel like my whole complexion is evening out. I also love to use this mask when I have breakouts because it soothes my skin. It smells great too (almost like raspberries), which is always a plus! There's definitely nothing worse than a bad smelling mask that you have to suffer through for 10 minutes. The only thing I do not like about this product is that it is a bit difficult to wash off. It does take a few minutes to wash off using water. Even when I apply it with my fingers I have to immediately wash it off my hands with warm water, and even that is kind of a struggle after only being on my fingers for a few seconds.

Pros 
-Reduces hyperpigmentation
-Soothes skin
-Smells good
-Do not need to use a lot of product
-Will last you a long time

Cons
-Difficult to wash off face/hands
-Pricier than most drugstore products

I hope you found this review helpful! Let me know if you enjoy product reviews and I will definitely start doing more!


October 6, 2013

September Favorites

I've always enjoyed reading other people's monthly favorites so I decided that I would share mine with you all. Here are my favorite products for the month of September:


I recently started using this powder to set my concealer under my eyes. It is made specifically for this area so that your concealer does not crease and it is also meant for highlighting. I am so in love with the way this powder works! Not only does it prevent my concealer from creasing, it gives such a perfect highlight effect to my face and really just brightens up the area under my eyes. I don't want to say that there is sparkle in this powder but it is definitely not completely matte and does have a little shimmer to it to really reflect the light. I use the shade "emphasize" (I'm a MAC NC15 concealer) which is the lightest shade.  If you are very pale like me, I would say definitely go for this shade..Don't be afraid if you get it and it looks stark white before you apply it-I promise it looks beautiful on! FYI- This is a MAC Pro product so it is not sold at the MAC counter, only online and at MAC Pro stores!

I got this lotion for free with my Ulta rewards points. I forget which points bracket it is part of..I'm pretty sure it is the second to last bracket. If you are a member of the Ulta rewards program, you probably know  that there isn't much of a selection when it comes time to get your reward, so when I went to pick mine out, I wasn't really sure what to get. This lotion seemed like it was the product that I would get the most use out of so I decided to get it. I had to choose between the vanilla plum scent or pomegranate, and at first I thought that vanilla and plum was kind of a weird combination, but it turned out that I really love the way this smells and I can't get enough! My skin isn't really very dry (at least for now-winter may be a different story!) so I can't really speak to how well it moisturizes dry skin, but I definitely love the way this feels on my skin and how it smells!
I've always loved using dry shampoos to extend the life of my styled hair. I can get really lazy with my hair and it's a pain to blow dry and straighten it so I try to milk it for all that it's worth once I do it. I recently got a keratin treatment in my hair, so that means I can't use the products that I once normally used. Also, the more you wash your hair, the shorter the lifespan of the treatment is. Considering this, I decided to get the dry shampoo made specifically for the keratin treatment that I have. I have definitely used some great dry shampoos before, but I really think that this one is a top contender. When I spray this in the roots of my hair and brush it out, it literally looks like I just washed and blew dried my hair! It looks so refreshed and I am absolutely in love with this stuff, and so happy that I bought it. 

If you know me, you know that I'm a germaphobe and always carry hand sanitizer with me everywhere I go! I get this lovely trait from my mom, so when she gave me some of this to use, it smelt amazing and I had to get my own (she bought it for me-thanks mom!) If you haven't smelt this one yet, go to B&BW right now and just smell it. You'll literally want to eat it.

I have a recent obsession with B&BW candles so when the new ones come out for each season I get so excited. They always have sales (literally ALWAYS) so I try to get the candles when they are 2 for $22. I've been burning this one all through September and it smells like spices and apples and just pure fall. 

I added the Clarisonic Mia 2 to my skincare routine back in June, but I didn't use it much over the summer because since it is an exfoliator, I didn't want to exfoliate my face too often and lose my summer tan. When I started using it again this month, I remember why I loved it so much in the first place. It leaves my skin so incredibly smooth and gives me a nice, radiant glow that I've never had before. I do have to admit that whenever I start using it, I break out for about a week but apparently that is normal for Clarisonic users and it's worth the week of breakouts to get through to amazing skin. Even when I don't use this for one night, my skin just does not look as good the next day. I don't think I will ever stop using this thing to clean my face. 

I've been doing my own nails a lot recently because I just haven't had the time to go get them done. Obviously doing your own nails can never compare to getting them done at the salon, mainly because they don't look as good, but also because whenever I do my own nails they always seem to chip right away. I have a few of these Sally Hansen nail polishes, and they are the only nail polishes that I own that don't chip in a day like my others. This one is my favorite color that I own! 

I don't wear lipstick too often, but I do love a bold lip every now and then. I think this is such a great color for fall, and right on trend with the dark, burgundy/cranberry lip colors that are so in right now. And, it's a drugstore product so it's very affordable which is definitely a plus!

This month I ordered a bunch of Sigma brushes and I love them all! This one I have been using to really sculpt out my contour with my bronzer. When I first saw it, I wasn't sure how well it would work for contouring because of how sharp and flat it is, but it works amazingly well and puts on just the right amount of bronzer for a natural look.

May 10, 2013

Nail Pictorial

Whenever I do my nails at home, I always like to do something a little different. I know my nails will never look as good when I do them myself at home as they do when I get them done at the salon, so to compensate, I try to spice them up in any way that I can. What better way to get creative than with your nails; they're not very noticeable, easy to fix if you make a mistake, and if you get bored with your mani, it only lasts a week! Last week I did my nails and lots of people were asking me how I did them, so I decided to do a "pictorial." It's ridiculously easy and there are so many possibilities for this manicure.

What you'll need:

-Nail strips (I'm using the Essie Sleek Sticks in "Steel the Show")
-Nail polish (I'm using Sally Hansen in "Lacey Lilac")

Step 1:
Choose the appropriate size strip for your ring finger and stick it onto your nail. (The reason mine is so short here is because I used the other half for my other nail. If you have short nails like me, you will find that when you file off the remaining strip [when using a full one], you'll have a lot left-it's a good idea to save the remaining strip..no sense throwing it out!)

 Step 2:
File the strip down to fit your nail.

Step 3:
Polish the rest of your nails normally, and repeat on your other hand of course. 
That's it! I wasn't kidding when I said this was ridiculously easy! You can do this at home in 3 easy steps and it looks so awesome. I hope this pictorial was helpful to anyone wanting to get creative with their DIY mani :) xo

May 4, 2013

Swept away by Buxom

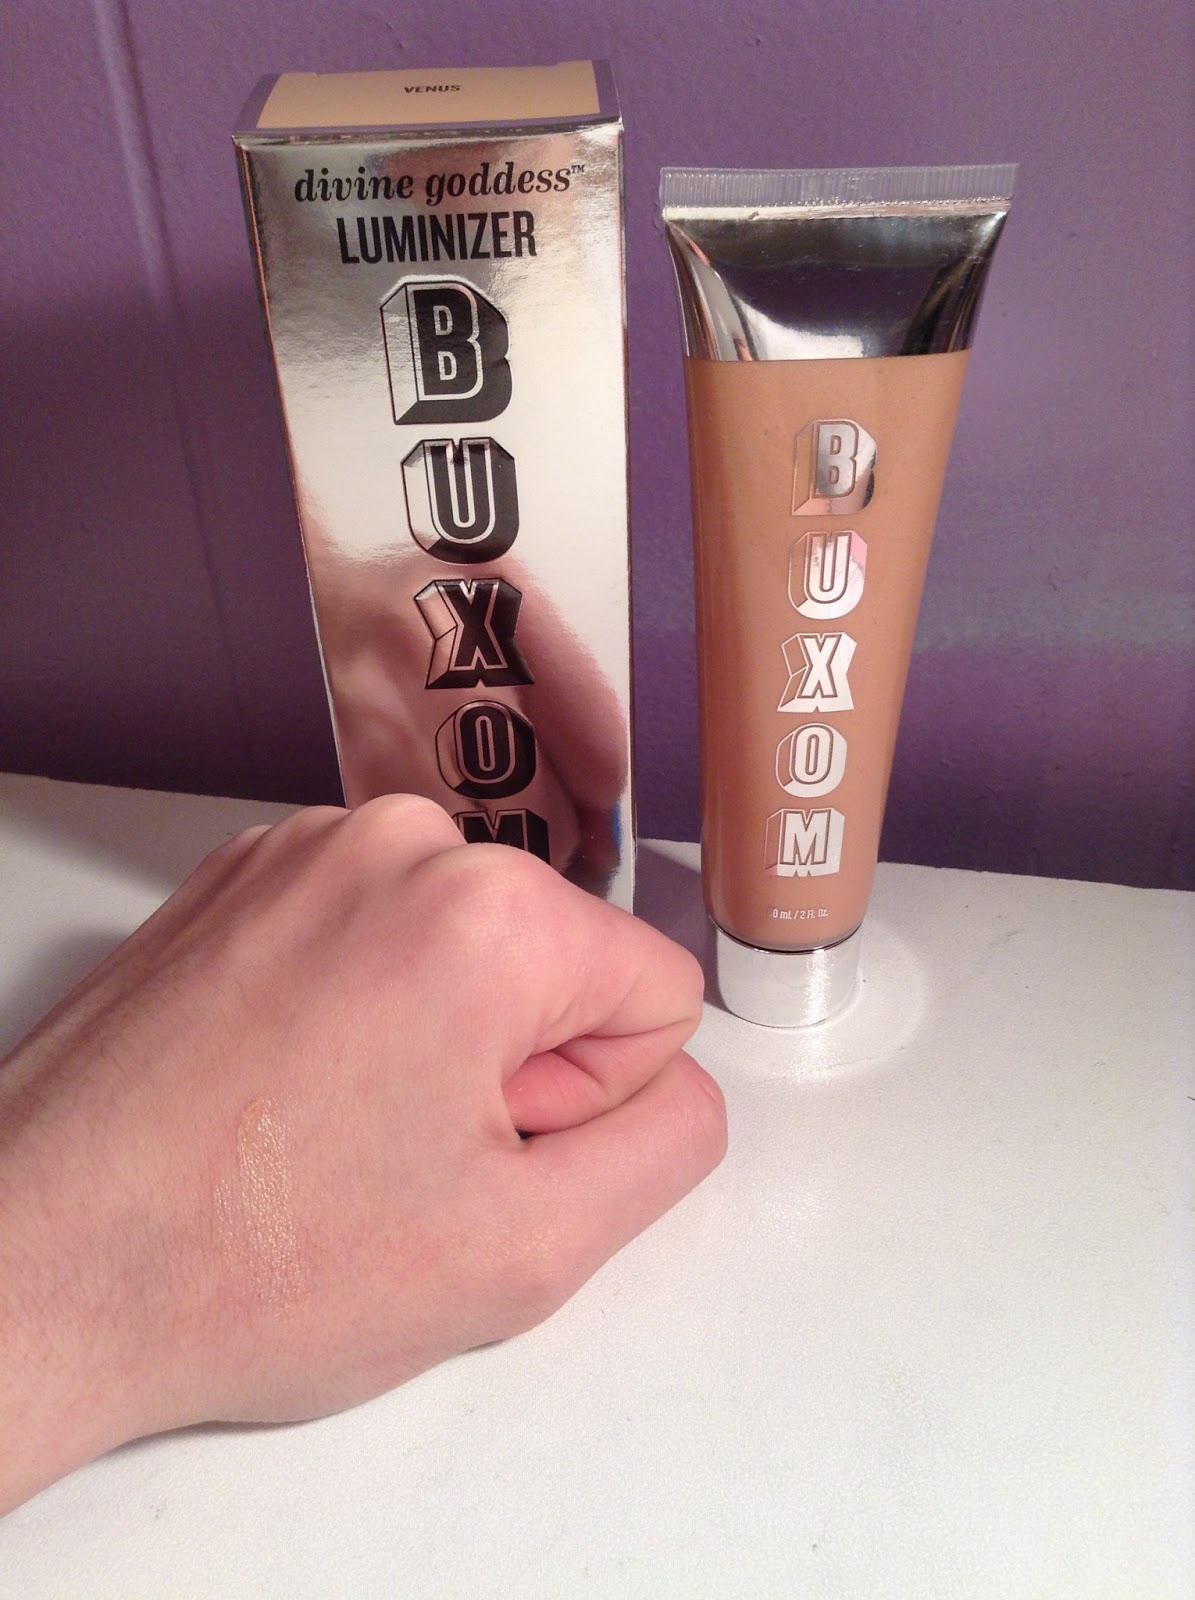
Recently I won a sweepstakes from Buxom cosmetics and Sephora...It was so so exciting (it still is!) being that I've never won anything in my life! I was so shocked to hear that I'd won. One of the prizes was a bunch of makeup from Buxom that I wanted to share with you all. The main prize was a trip to Las Vegas, and I also won a Rebecca Minkoff purse which I will also post on here later on to show you guys. And of course, when I go to Vegas, I'll post plenty of pictures! Anyways.. All of the Buxom products are great quality and you can find them at Sephora. Here are pictures and swatches of everything I received:

Buxom Stay-There Eyeshadow in "Mutt"

 Full Bodied Lipstick in "Two Timer," "Exhibitionist," and "Provocateur" 


 Color Choreography Eyeshadow Palette in "Belly Dance"

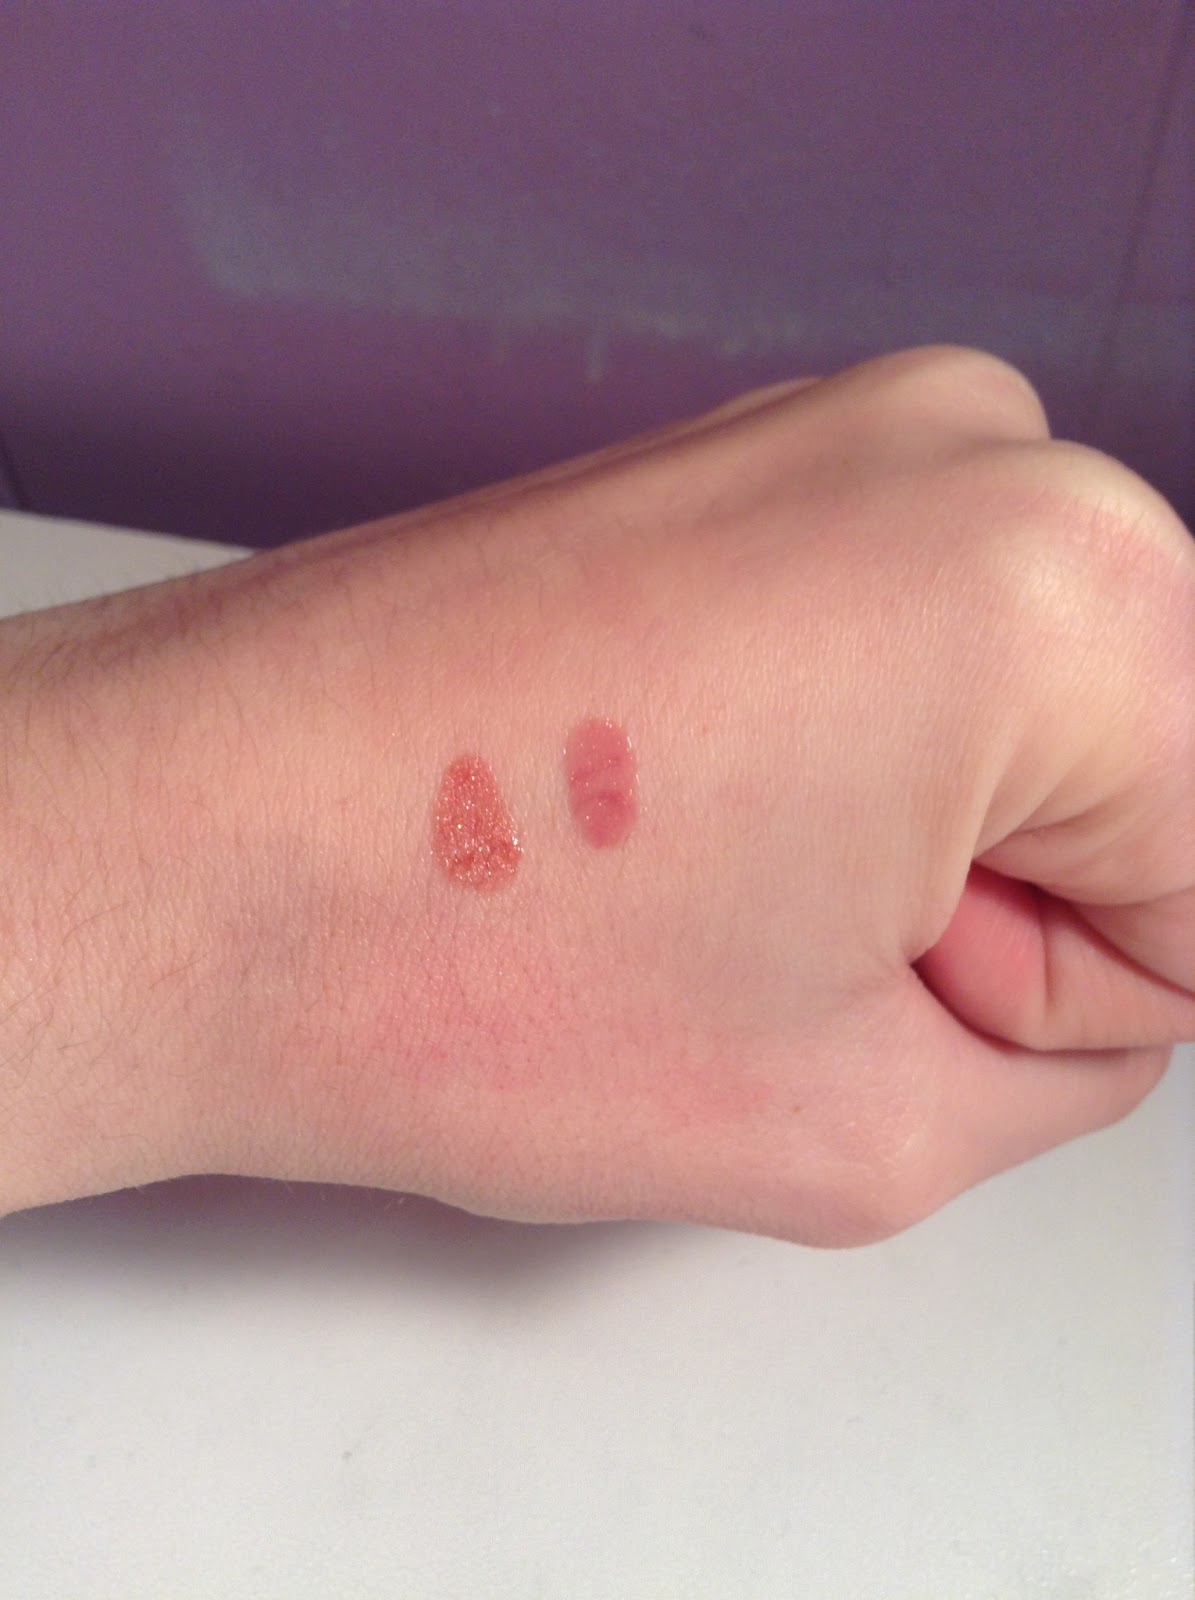
 Full Bodied Lip Gloss in "Hot Mama"

 Big & Healthy Lip Cream in "White Russian"

 Stick Around Eye Primer in "Captive"


 Big & Healthy Lip Polish in "Sugar" and "Dolly"
 Big & Healthy Lip Cream in "Pink Lady"

 True Hue Blush in "Rendezvous"

 Pen & Ink Long Last Eyeliner in "P.S.-Black"

 Divine Goddess Luminizer


Passport Collection- The Day Tripper Edition


February 7, 2013

Throwback Thursday

Hi guys! Today's post was inspired by a lot of nostalgia, so I thought it'd be perfect for "throwback thursday!" The other day I was looking at one of my old scrapbooks that I have and I found an Ulta receipt that I saved from March 8, 2003! I remember this exact trip to Ulta. I was 13 years old and my friend and I began to really get into makeup. We would always go on shopping sprees to Ulta. I know I saved this receipt because I ended up spending $40 on makeup, and I thought that was like, the craziest thing ever lol. You're probably wondering where I got $40 at 13 years old to spend on makeup...but the date on the receipt tells me it was probably my birthday money since that is only like a week after my birthday. Looking at the actual items on the receipt made me start to think back to wearing makeup in middle school and all of the products that I used to use..most aren't even around anymore. I remember I would always match my eyeshadow to my outfit..The colors I wore to school the most were blue, and my cheerleading uniform which was black and gold. I specifically remember having a blue and a gold glitter liquid eyeliner that I wore all of the time (I'm sure that blue eyeliner looked fantastic on me..lol) And I always remember lighting my gold pencil eyeliner with a lighter to make it melt and go on smoother and have more pigment! Lol..My makeup habits have definitely changed now, as have soo many of the products on the market..but one thing that definitely has not changed is my love for makeup :)

Here's a picture of the Ulta receipt:


Here are some of the products that I remember using often in middle school! They bring back such memories for me, and maybe for you too.


Caboodles Lip Shimmer
I sooo vividly remember these Caboodles lipglosses! I know for a fact I had it in clear with sparkles. I don't think this brand even exists for makeup anymore, I think they only make makeup cases now!

Caboodles Lip Gloss
More Caboodles of course...I was obviously very into this brand for some reason lol. But I definitely remember having this lipgloss with the little balls inside.
Caboodles Eyegloss
 I don't know why I was so into glitter during middle school. I guess I didn't really have a makeup sense yet and was just attracted to anything showy or conventionally "pretty." I had this in silver glitter and i remember it being like a balm that you apply with your finger..I think this is actually one of the items from the Ulta receipt above.

Caboodles Loose Glitter
Moreeee Caboodles and more glitter... I definitely had this in pink and white! I used to apply it to my eyelids...it probably looked like a mess lol!
Clinique Eyeshadows
I always remember these little green cases floating around in my vanity drawer. I probably got them from my mom whenever she got them as free samples, because I know I was not buying Clinique makeup in middle school lol. I specifically remember having this eyeshadow in blue and taupe.

CoverGirl Eyeshadow-  Ice Princess
I'm pretty sure CoverGirl still to this day makes this eyeshadow set. But I know I had it and I can even remember in my head seeing it in my vanity all of the time!
CoverGirl Outlast Lip Shine
CoverGirl definitely still makes this too, but in a different packaging. This is a picture of the old school one that I definitely had in a more red shade. I remember I didn't like the way the color looked on me so I used to just use the clear stick (the part that is supposed to make the product last for a long time) on its own as like a clear lip gloss. Clearly, I was a bit rebellious with the makeup rules.

Jane Megabites Glossy Gloss
I don't think this brand exists anymore! But from what I recall it was pretty popular back then, at least where I lived. I can still remember seeing the walls at the stores with all of these "Jane" products. There were so many and so many girls had them! 

Jane Eye Zing
If you look at the Ulta receipt you can see I bought these on my shopping spree.. I must have had these $3.99 eyeshadows in every color. I can remember having this lilac color, white, blue, and a metallic turquoise color (oh boy). And I used to wet them before putting them on to get them to look more pigmented. I wonder where I learned all of these tricks? 
Naturalistics Glitter Stix
I know I had these in white and blue. They were basically a stick of glitter that you twist up and apply to your eye lids..or at least that was where I applied them to (not surprising).

Smackers Lip Sparkler
I can almost smell the way this lip gloss smelled just by looking at it and thinking back to it. It was amazing and smelt just like a frosting! The one I had, that is pictured here, was called "Vanilla Frosting." It was like a white-silver sheer color with a hint of sparkle. I'm not sure if they still make it.

Wet N Wild Loose Glitter
I had this silver glitter and used to apply it alll over my eyelids. I don't even want to know what that must have looked like. Hopefully all of this glitter was in style back then, otherwise I really don't know what I was thinking! I guess at that age it's okay to play around with makeup and have fun with it while you are discovering who you are, what you like, and what you want to look like :)

Glow by J. Lo
This obviously isn't a makeup product but it still reminds me of middle school..I always wore this scent and it really reminds me of 7th-8th grade whenever I smell it! It was almost like a musky smell..I don't think the smell was really suited for a 13 year old  but I guess I just liked it. I'm sure it's still around. I also had J.Lo's other fragrance, Love at first Glow, which was amazing. 

Hope you enjoyed this throwback!